

Setting up an IMAP email account on Android

by Sam Davis
When you receive your website, you will have a number of options with regards how you’d like your email configured and setup. Using IMAP is a popular option for people who want to use mail applications on different devices. Unlike POP mail, IMAP will make sure all mail is synchronised between, say – your phone, tablet, and laptop.
The following guide shows you how to install an IMAP email account on an Android Phone.
Step 1
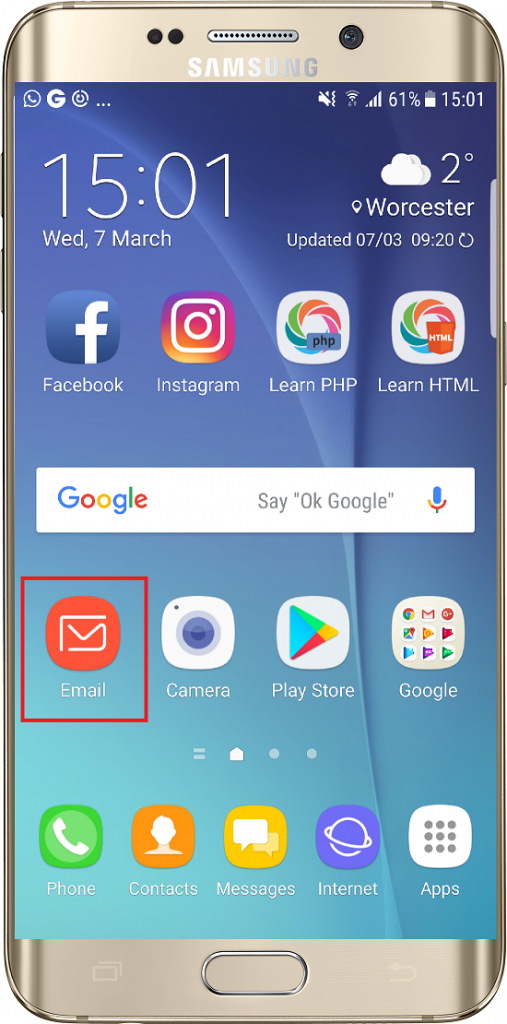
Firstly, let’s start by opening the Email application.
Step 2
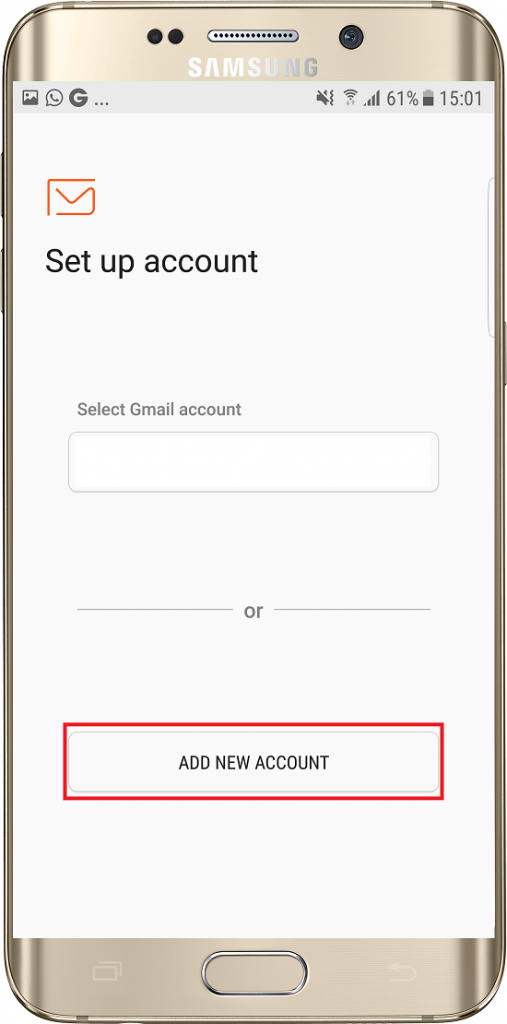
If you have not used the Email app before, you will have the option to Add New Account. If you already have an account setup, please use the alternative method shown at the bottom of this guide.
Step 3
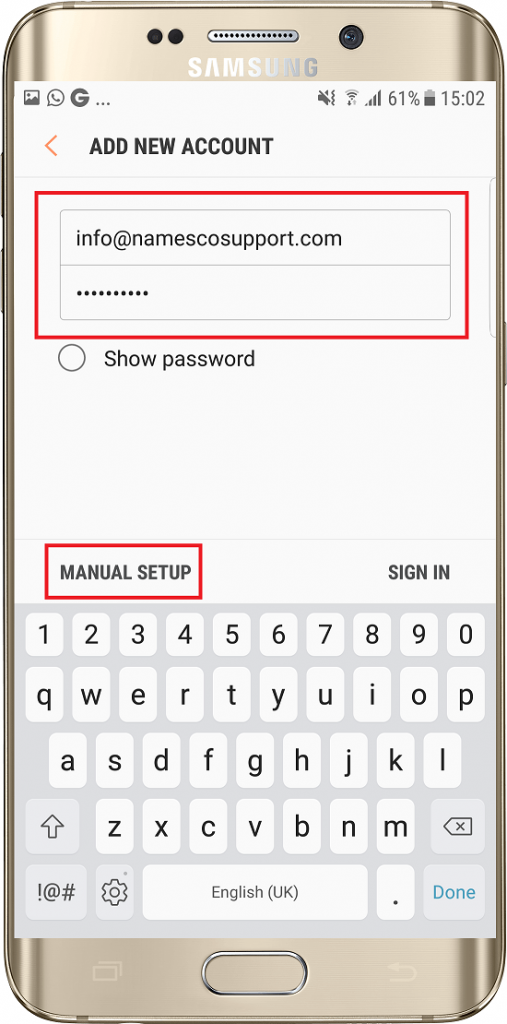
On the next page enter your Email Address and Email Password, and choose Manual Setup.
Step 4
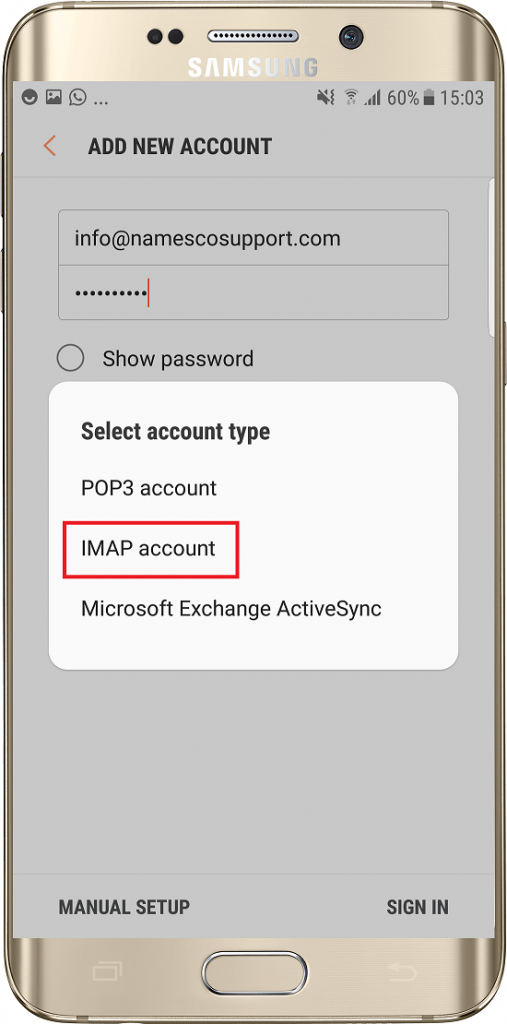
Choose the option for IMAP.
Step 5
Now enter your Email Address as the Username and complete the Incoming Serversettings as shown below.
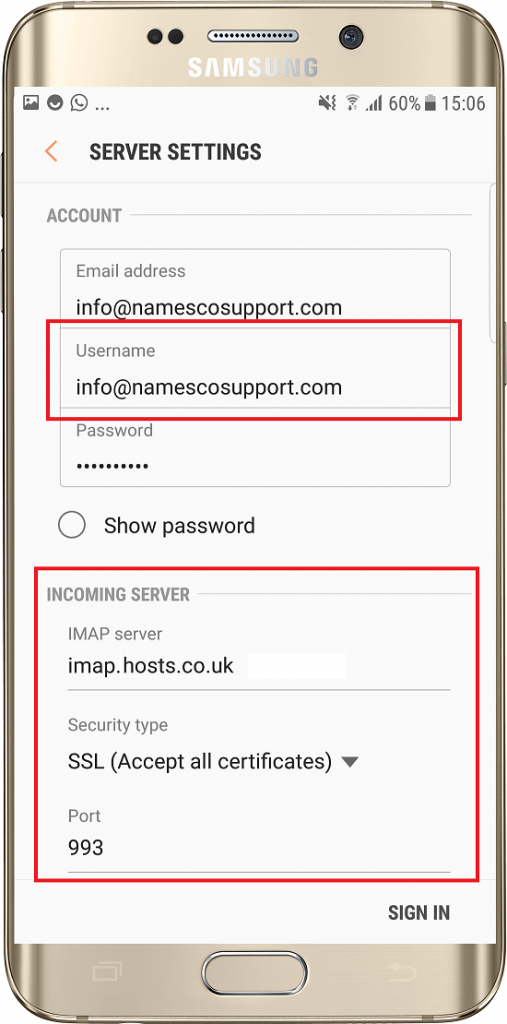
Step 6
Scroll down and enter the Outgoing Server settings – once again you will need to use your Email Address and Email Password. Once you have entered this information tap Sign In
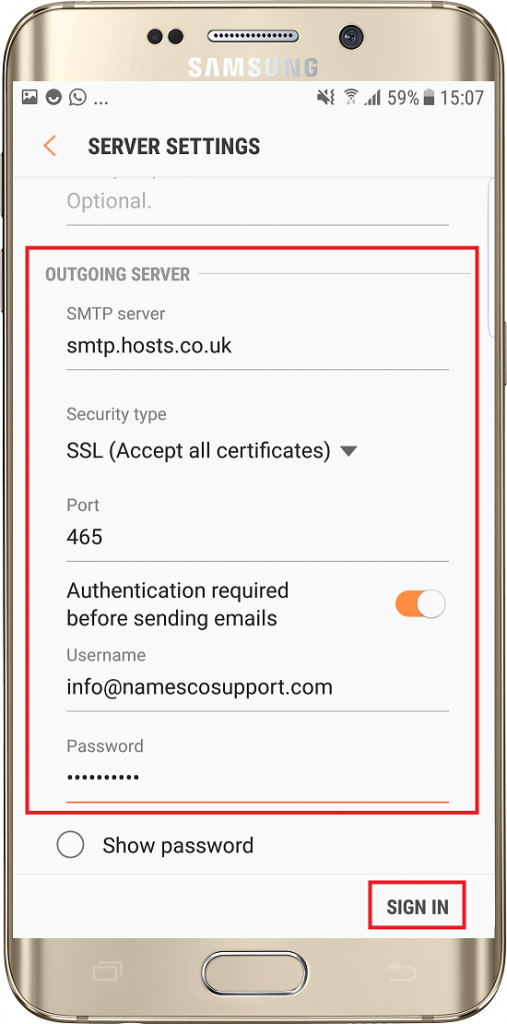
Your email account will now be setup.
Alternative method to add a new account
If you already have an account setup within the Email app, you will need to use the alternative method to add a new account.
Firstly tap the Menu icon at the top left corner of the screen.
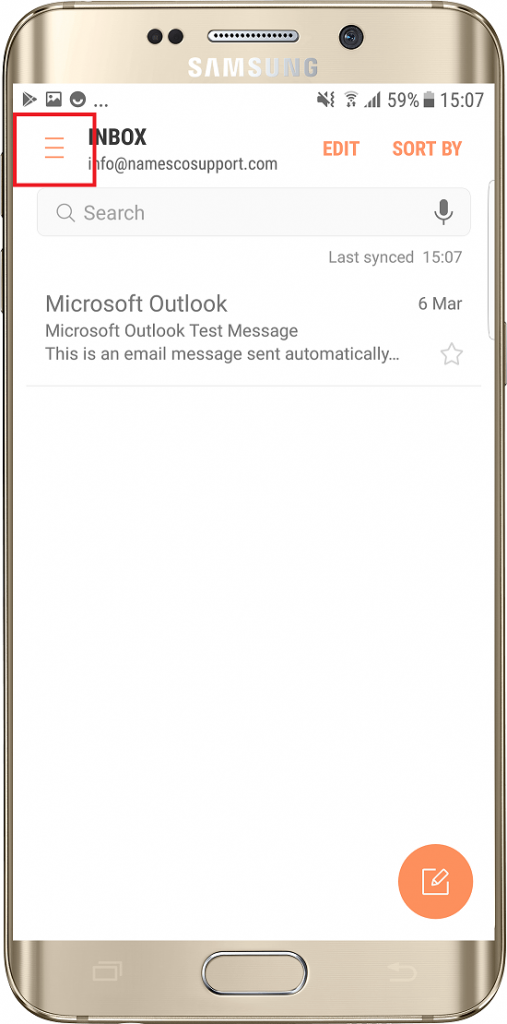
Next tap the Settings cog.
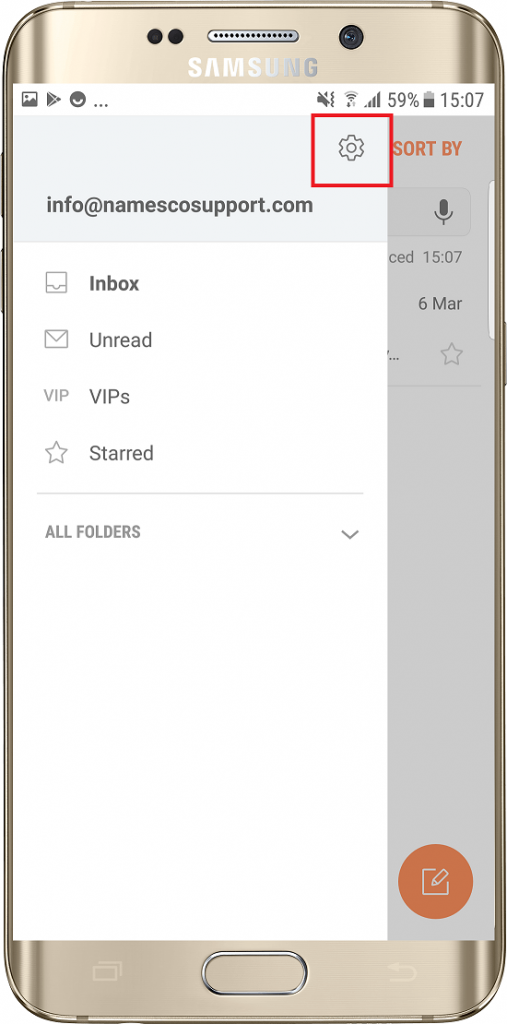
Select the option for Add New Account.

You can now follow the instructions above to setup a new email account.

Sam Davis
I am fanatical about providing useful web experiences, via bespoke websites which engage, inform and entertain. I have been making websites since a young age, and am a keen supporter of AFC Bournemouth.
Recommended Posts
Setting up an IMAP email account in Mac Mail
27/04/2018
